Tuesday, December 11, 2012

Step by Step guide to install SQL Server 2008 R2


A Step by Step guide to install SQL Server 2008 R2


Developers and system administrators will find this installation guide useful, as well as DBAs. It will teach you the basics required for a typical, problem-free installation of SQL Server 2008 R2, allowing you to add other components later if you wish. 
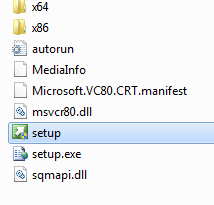

Step 1: Setup.exe


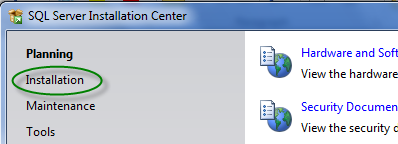
Step 2: SQL Server Installation Center
Click on the Installation hyperlink on the left hand side of the screen: 


Step 3: SQL Server Installation Center
Click on the "New installation or add features to an existing installation." link on the right side of the screen:
A command prompt window will flash and Setup Rules dialog box will show up.


Step 4: Pre-requisites check


You need to make sure that all Setup Rules are passed. If there are failed rules, you won’t be able to proceed.
In case of warnings, you can continue to install, but you still should note the warning and take corrective measures, before or after installation.
Click on the OK button.


Step 5: Product key
The Product Key page is used to authenticate your license of SQL Server or choose to install a free edition – Evaluation Enterprise Edition, Express Edition, or Express Edition with Advanced Services. Copies downloaded from MSDN often have the product key supplied automatically. 
Click on the Next button.


Step 6: License Terms
Go through the License Terms and if you are agrees upon the terms, then check on “I accept the license terms”. 


Click on the Next button.
Step 7: Setup Support Files


Click on the Next button.


Step 8: Setup Support Rules


You need to make sure that all Setup Rules are passed. If there are failed rules, you won’t be able to proceed. In case of warnings, you can continue to install, but you still should note the warning and take corrective measures, before or after installation.
As you will see here there has been Warning upon the Windows Firewall, so it’s a default warning and you need not had to worry about it. Just check that it should be using the Port No. 1433. Click on the “Warning” link. So a dialog box will appear. 


Click on the Next button.


Step 9: Setup Role
Here we have three kinds of Setup roles available for the installation.


SQL Server Feature Installation’ is the installation option which individually selects which feature component to install, or click a feature role to install a specific configuration.
SQL Server PowerPivot for SharePoint’  gives users the ability to analyze massive quantities of data, and its seamless integration with Microsoft SharePoint Server 2010 helps IT departments monitor and manage how users collaborate.
‘All Features with Defaults’ install all the features using the default values for the service accounts.
We have selected here SQL Server Feature Installation and then Click on Next.


Step 10: Feature Selection
So under the Feature Selection, it’s on you what the feature you want to work with. You have the option to either Select All or multiple options can be selected. If you want to feature all of these features, then click on Select All.


Once the option are selected click Next button to proceed further.


Step 11: Installation Rules 


Installation Rules are the predefined rule which is being used to check if the Operation are being completed, or blocked. So if there has been any Operation which is being “Failed” or “Warning”, certain actions should be taken around before preceding it further.
Click on the Next button.


Step 12: Instance Configuration
Instance Configuration is the crucial part of your installation where you need to choose among the two: Default Instance or Named Instance.


Default Instance is the one under which there an Instance name which is being defined and cannot be changed, and you can have only one Default Instance. But the advantage of having Named instance is that you can name them, so it’s easier for you to identify each one of them uniquely. So we have chosen here Named Instance and specified a name SQLSERVER2KR2.
Click on the Next button


Step 13: Disk Space Requirements
Your system should surpass the requirements of space required by the installation process.


Click on Next button.


Step 14: Server Configuration
Sever Configuration page shows up the service accounts and collation configuration. Click on Use the same account for all SQL Server services.


This page supplies server options for the Database Engine component. Here is where the Windows service account is configured so that SQL Server will have permission to execute and access to files.
Also configured in this page is the initial startup type, which determines whether the services start automatically when Windows starts or whether they require manual starting.
Click on the Use the same account for all SQL Server Services to provide the username and password as given in the below screenshot.


Here I don’t have Active Directory setup so I am using the local admin account but if you have any AD Account please use the same.
After inserting the Account Name and Password, Click on Ok and all the empty username and password filled with the provided username.
A common error on this page is to miss the Collation tab on this page. The default is probably OK for most installations, but be careful that you don’t miss this important step.
Click on Next button.


Step 15: Database Engine Configuration
Click on Account Provisioning tab


Here in the Database Engine Configuration, you have to select the authentication mode out of the two: Windows Authentication & Mode and Mixed Mode.
Windows Authentication Mode enables Windows Authentication and disables SQL Server Authentication.
Mixed Mode enables both Windows Authentication and SQL Server Authentication. SQL Server Authentication becomes very important part when it comes to security, so there should be credentials (login and password) every time that they connect. 
After you enter the password, Click on “Add current user” as shown in the below screenshot.


Click on Data Directories tab


Ideally the User data and the log files directory should be kept separately from each other which enhance the performance. The same is also is in the case of Temp DB data and log files directory. The Backup directory is also being kept separate from rest of these will either be in Tape drive or other disks.
The Filestream tab is where Filestream is enabled for the server.
Click on Next button

Step 16: Analysis Services Configuration
The Analysis Services Configuration page is being used to add initial users with administrative permission and configure the default directories for Analysis Services.


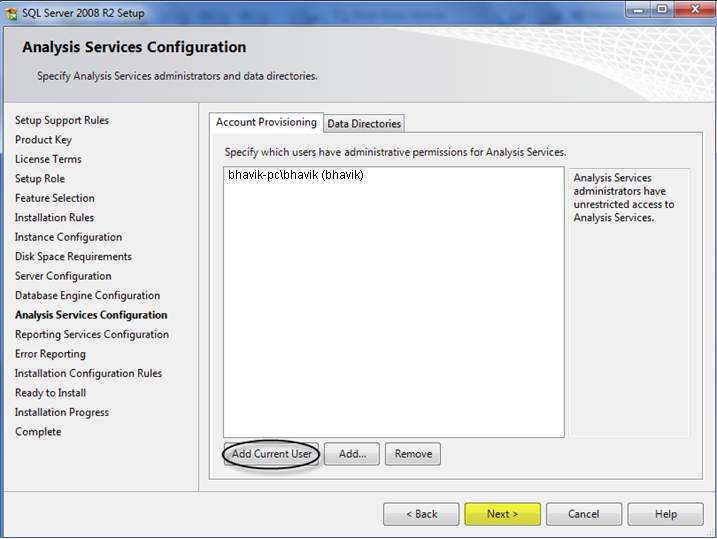
Click on the Account Provisioning tab and then click on the Add Current User button.
Click on Data Directories tab. As we said earlier Data and Log files directory must be a separate one, so it should be follow it again.
Click on Next button.


Step 17: Reporting Services Configuration
The Reporting Services Configuration Page is being used to select the native configuration or SharePoint configuration.
You should choose ‘Install the native mode default configuration’.


Click on Next button.


Step 18: Error Reporting
The Microsoft SQL Server team really does use this information to collect usage statistics on SQL Server features and error reports. This information is key to determining where the team’s efforts should be invested.
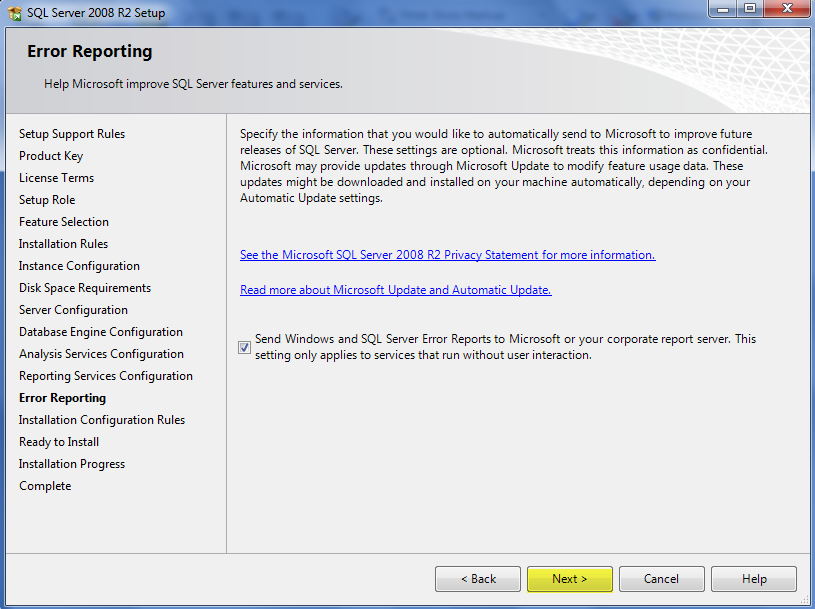
Here check on the “Send Windows and SQL Server …”and then click on Next.


Step 19: Installation Configuration Rules
This rendition of the Rules page verifies the installation Configuration.
Click on Next button.


Step 20: Ready to Install
The Ready to install page reports the complete configuration in a tree view, and the location of the created .ini file with these configuration options.


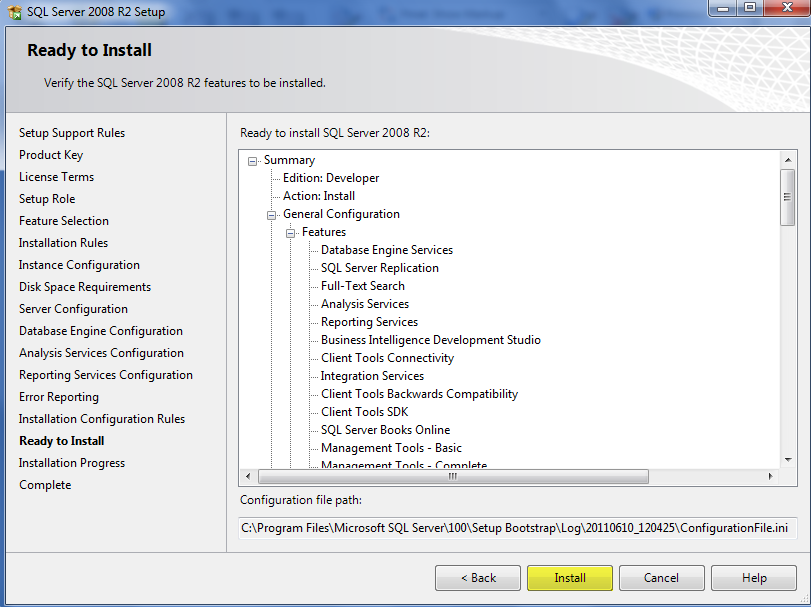
Click on Install button.


Step 21: Completion Page
The installation for the SQL Server 2008 R2 has been completed. There might be some warnings, let see.


If you will get this warning, then carefully perform for each and every warning:

  • Setup has detected a non-canonical discretionary access control list (DACL) on directory 'C:\Program Files (x86)\Microsoft SQL Server\90\Shared\'. Please verify your security settings and make corrections if needed.
Select the folder 'C: \Program Files (x86)\Microsoft SQL Server\90\Shared\'   -> Right-Click -> Properties -> Security Tab -> Edit. Then the error will show up that the permissions are not proper; do you want to order them? Click Reorder and add permissions.
  • Setup has detected a non-canonical discretionary access control list (DACL) on directory 'C:\Program Files\Microsoft SQL Server\MSAS10_50.SQLSERVER2K8R2\OLAP\bin\'.Please verify your security settings and make corrections if needed.
Select the folder 'C:\Program Files\Microsoft SQL Server\MSAS10_50.SQLSERVER2K8R2\OLAP\bin\'  ->  Right-Click  -> Properties  ->  Security Tab  ->  Edit. Then the error will show up that the permissions are not proper; do you want to order them? Click Reorder and add permissions.
  • Setup has detected a non canonical discretionary access control list (DACL) on directory 'C:\Program Files\Microsoft SQL Server\MSAS10_50.SQLSERVER2K8R2\OLAP'. Please verify your security settings and make corrections if needed.
Select the folder 'C:\Program Files\Microsoft SQL Server\MSAS10_50.SQLSERVER2K8R2\OLAP'  ->  Right-Click  -> Properties  ->  Security Tab  ->  Edit. Then the error will show up that the permissions are not proper; do you want to order them? Click Reorder and add permissions.


iMerge Group Blogspot will now be known as Ingress IT Solutions Blog

Hello Friends,

iMerge Group Blogspot will now be known as Ingress IT Solutions Blog. All post, information and examples will be managed by Ingress Team.

You can visit ingressit.com website for more information.

Ingress Team will manage post related to Oracle, MS-SQL Server, MySQL, PostgreSQL, Sybase Database and other technical information that will help you in your professional career with real-time scenarios.

Thanks,
iMERGE Group Team.

Tuesday, April 24, 2012

Resolved: PRCR-1079 ORA-00119 CRS-2674 CRS-2528 Oracle 11g Release 2 Cannot Start Database

Issue: Cannot start the database with SRVCTL start database -d testdb

srvctl start database -d testdb


PRCR-1079 : Failed to start resource ora.testdb.db
ORA-00119: invalid specification for system parameter %s
CRS-2674: Start of 'ora.testdb.db' on 'linux-rac01' failed
CRS-2528: Unable to place an instance of 'ora.testdb.db' as all possible servers are occupied by the resource already
ORA-00119: invalid specification for system parameter %s
CRS-2674: Start of 'ora.testdb.db' on 'linux-rac02' failed

To troubleshoot further if you try to open the database from SQLPLUS with any of the instances you will receive below error message.

SQL> startup


ORA-00119: invalid specification for system parameter REMOTE_LISTENER
ORA-00132: syntax error or unresolved network name 'linux-rac-scan:1521'


There is a remote.listener parameter in spfile/pfile. If you are using SPFILE then try to create a pfile using spfile with below command.

SQL> create pfile='/tmp/ptestdb.ora' from spfile='+Data/testdb/pfiletestdb.ora'

Open the pfile you will find a parameter *.remote.listener which will be something like this:

*.remote_listener='linux-rac-scan:1521'


The error here is because when I checked srvctl config scan I found that scan name is a fully qualified name linux-rac-scan.ingress.com where as here it is initial. So we need to modify this parameter and should change it to:

*.remote_listener='linux-rac-scan.ingress.com:1521'


Once the modification is done try to open the database on any of the instance using that particular pfile.

SQL>startup pfile='/tmp/ptestdb.ora'
Database will be opened without any errors. Once this modification is done try to re-create spfile using this pfile by below command.

SQL> create spfile='+Data/testdb/pfiletestdb.ora' from pfile='/tmp/ptestdb.ora'


Once the Spfile is created shutdown database and try to start the database using srvctl command.

srvctl start database -d testdb -o open

You will see that command will get successfully completed and your database will be up and running.

Hope this article will help you in your issue. If you have any trouble please feel free to drop a comments.

Resolved: PRCR-1079 ORA-00119 CRS-2674 CRS-2528 Oracle 11g Release 2 Cannot Start Database

Issue: Cannot start the database with SRVCTL start database -d testdb

srvctl start database -d testdb


PRCR-1079 : Failed to start resource ora.testdb.db
ORA-00119: invalid specification for system parameter %s
CRS-2674: Start of 'ora.testdb.db' on 'linux-rac01' failed
CRS-2528: Unable to place an instance of 'ora.testdb.db' as all possible servers are occupied by the resource already
ORA-00119: invalid specification for system parameter %s
CRS-2674: Start of 'ora.testdb.db' on 'linux-rac02' failed

To troubleshoot further if you try to open the database from SQLPLUS with any of the instances you will receive below error message.

SQL> startup


ORA-00119: invalid specification for system parameter REMOTE_LISTENER
ORA-00132: syntax error or unresolved network name 'linux-rac-scan:1521'


There is a remote.listener parameter in spfile/pfile. If you are using SPFILE then try to create a pfile using spfile with below command.

SQL> create pfile='/tmp/ptestdb.ora' from spfile='+Data/testdb/pfiletestdb.ora'

Open the pfile you will find a parameter *.remote.listener which will be something like this:

*.remote_listener='linux-rac-scan:1521'


The error here is because when I checked srvctl config scan I found that scan name is a fully qualified name linux-rac-scan.bhavik.com where as here it is initial. So we need to modify this parameter and should change it to:

*.remote_listener='linux-rac-scan.bhavik.com:1521'


Once the modification is done try to open the database on any of the instance using that particular pfile.

SQL>startup pfile='/tmp/ptestdb.ora'
Database will be opened without any errors. Once this modification is done try to re-create spfile using this pfile by below command.

SQL> create spfile='+Data/testdb/pfiletestdb.ora' from pfile='/tmp/ptestdb.ora'


Once the Spfile is created shutdown database and try to start the database using srvctl command.

srvctl start database -d testdb -o open

You will see that command will get successfully completed and your database will be up and running.

Hope this article will help you in your issue. If you have any trouble please feel free to drop a comments.

Tuesday, April 17, 2012

Oracle 11g Release 2 Real Application Cluster ERROR ORA-12505 with Java JDBC

Recently I was facing an issue with JAVA when trying to connect my Oracle 11g Release 2 RAC Database that was using SCAN Listener.

Below is the test program that I have used to check the connection between JAVA and Oracle Database.

import java.sql.*;

class ScanTest {
public static void main(String args[]) throws SQLException {
DriverManager.registerDriver(
new oracle.jdbc.driver.OracleDriver()
);
String serverName = "rac-scan.ingresstest.com";
int port = 1525;
String user = "scott";
String password = "tiger";
String SID = "orcl";
String URL = "jdbc:oracle:thin:@" + serverName + ":" + port + ":" + SID;
Connection conn = DriverManager.getConnection(URL, user, password);
String SQL = "SELECT tname, tabtype FROM tab";
Statement stat = conn.createStatement();
ResultSet rs = stat.executeQuery(SQL);
while (rs.next()) {
System.out.println(
rs.getString(1)
);
}
stat.close();
conn.close();
}
}

 It always ended up with an error given below.
 
Exception in thread "main" java.sql.SQLException: Listener refused the connection with the following error:


ORA-12505, TNS:listener does not currently know of SID given in connect descriptor
The Connection descriptor used by the client was:
rac-scan.ingresstest.com:1525:ORCL

at oracle.jdbc.driver.DatabaseError.throwSqlException(DatabaseError.java:112)
at oracle.jdbc.driver.DatabaseError.throwSqlException(DatabaseError.java:261)
at oracle.jdbc.driver.T4CConnection.logon(T4CConnection.java:387)
at oracle.jdbc.driver.PhysicalConnection.(PhysicalConnection.java:439)
at oracle.jdbc.driver.T4CConnection.(T4CConnection.java:165)
at oracle.jdbc.driver.T4CDriverExtension.getConnection(T4CDriverExtension.java:35)
at oracle.jdbc.driver.OracleDriver.connect(OracleDriver.java:801)
at java.sql.DriverManager.getConnection(Unknown Source)
at ScanTest.main(ScanTest.java:15)

Solution to the above problem is because when doing an Installation of Oracle Database 11g Release 2: RAC you might have used Normal Database Configuration which is not recommended by Oracle Corporation.

Oracle recommends to use Custom when you are creating a database with DBCA utility on RAC platform Ver 11g Release 2.

:: you are accessing the server with a database SID, whereas :/ will access a service.

The SCAN Listener only know of services, and not of database SIDs.


So either you can modify your connection URL to

String serverName = "rac-scan.ingresstest.com";

int port = 1525;
String user = "scott";
String password = "tiger";
String Service_Name = "orcl";
String URL = "jdbc:oracle:thin:@" + serverName + ":" + port + "/" + Service_Name;
Connection conn = DriverManager.getConnection(URL, user, password);

or you can use it with below method if you can add the custom URL for JDBC and using SCAN Listener.

jdbc:oracle:thin:@(DESCRIPTION=(ADDRESS=(PROTOCOL=TCP)(HOST=rac-scan.ingresstest.com)(PORT=1525))(CONNECT_DATA=(SERVICE_NAME=orcl)))

if you are not using SCAN Listener then create your JDBC URL in below method.

jdbc:oracle:thin:@(DESCRIPTION=(LOAD_BALANCE=on)

(ADDRESS=(PROTOCOL=TCP)(HOST=linux-rac01) (PORT=1525))
(ADDRESS=(PROTOCOL=TCP)(HOST=linux-rac02) (PORT=1525))
(CONNECT_DATA=(SERVICE_NAME=orcl)
(FAILOVER_MODE =
(TYPE = SELECT)
(METHOD = BASIC)
(RETRIES = 180)
(DELAY = 5)
)
)
)

Oracle 11g Release 2 Real Application Cluster ERROR ORA-12505 with Java JDBC

Recently I was facing an issue with JAVA when trying to connect my Oracle 11g Release 2 RAC Database that was using SCAN Listener.

Below is the test program that I have used to check the connection between JAVA and Oracle Database.

import java.sql.*;

class ScanTest {
public static void main(String args[]) throws SQLException {
DriverManager.registerDriver(
new oracle.jdbc.driver.OracleDriver()
);
String serverName = "rac-scan.bhaviktest.com";
int port = 1525;
String user = "scott";
String password = "tiger";
String SID = "orcl";
String URL = "jdbc:oracle:thin:@" + serverName + ":" + port + ":" + SID;
Connection conn = DriverManager.getConnection(URL, user, password);
String SQL = "SELECT tname, tabtype FROM tab";
Statement stat = conn.createStatement();
ResultSet rs = stat.executeQuery(SQL);
while (rs.next()) {
System.out.println(
rs.getString(1)
);
}
stat.close();
conn.close();
}
}

 It always ended up with an error given below.
 
Exception in thread "main" java.sql.SQLException: Listener refused the connection with the following error:


ORA-12505, TNS:listener does not currently know of SID given in connect descriptor
The Connection descriptor used by the client was:
rac-scan.bhaviktest.com:1525:ORCL

at oracle.jdbc.driver.DatabaseError.throwSqlException(DatabaseError.java:112)
at oracle.jdbc.driver.DatabaseError.throwSqlException(DatabaseError.java:261)
at oracle.jdbc.driver.T4CConnection.logon(T4CConnection.java:387)
at oracle.jdbc.driver.PhysicalConnection.(PhysicalConnection.java:439)
at oracle.jdbc.driver.T4CConnection.(T4CConnection.java:165)
at oracle.jdbc.driver.T4CDriverExtension.getConnection(T4CDriverExtension.java:35)
at oracle.jdbc.driver.OracleDriver.connect(OracleDriver.java:801)
at java.sql.DriverManager.getConnection(Unknown Source)
at ScanTest.main(ScanTest.java:15)

Solution to the above problem is because when doing an Installation of Oracle Database 11g Release 2: RAC you might have used Normal Database Configuration which is not recommended by Oracle Corporation.

Oracle recommends to use Custom when you are creating a database with DBCA utility on RAC platform Ver 11g Release 2.

:: you are accessing the server with a database SID, whereas :/ will access a service.

The SCAN Listener only know of services, and not of database SIDs.


So either you can modify your connection URL to

String serverName = "rac-scan.bhaviktest.com";

int port = 1525;
String user = "scott";
String password = "tiger";
String Service_Name = "orcl";
String URL = "jdbc:oracle:thin:@" + serverName + ":" + port + "/" + Service_Name;
Connection conn = DriverManager.getConnection(URL, user, password);

or you can use it with below method if you can add the custom URL for JDBC and using SCAN Listener.

jdbc:oracle:thin:@(DESCRIPTION=(ADDRESS=(PROTOCOL=TCP)(HOST=rac-scan.bhaviktest.com)(PORT=1525))(CONNECT_DATA=(SERVICE_NAME=orcl)))

if you are not using SCAN Listener then create your JDBC URL in below method.

jdbc:oracle:thin:@(DESCRIPTION=(LOAD_BALANCE=on)

(ADDRESS=(PROTOCOL=TCP)(HOST=linux-rac01) (PORT=1525))
(ADDRESS=(PROTOCOL=TCP)(HOST=linux-rac02) (PORT=1525))
(CONNECT_DATA=(SERVICE_NAME=orcl)
(FAILOVER_MODE =
(TYPE = SELECT)
(METHOD = BASIC)
(RETRIES = 180)
(DELAY = 5)
)
)
)

Add SCAN LISTENER in 11g Release 2

I have built database server with single SCAN LISTENER for some testing purpose. Now I need to add other 2 SCAN LISTENER so was trying to do it with the SRVCTL Utility so here are the steps on how to add scan listener after doing entire built of database server with single SCAN LISTENER.

[grid@linux-rac01 grid]$ srvctl config scan

SCAN name: rac-scan, Network: 1/192.168.20.0/255.255.255.0/eth2
SCAN VIP name: scan1, IP: /rac-scan.ingresstest.com/192.168.50.102
[grid@linux-rac01 grid]$ srvctl config scan_listener
SCAN Listener LISTENER_SCAN1 exists. Port: TCP:1525

[grid@linux-rac01 grid]$ ping rac-scan.ingresstest.com
PING rac-scan.ingresstest.com (192.168.50.103) 56(84) bytes of data.
From linux-rac01.ingresstest.com (192.168.20.50) icmp_seq=2 Destination Host Unreachable
From linux-rac01.ingresstest.com (192.168.20.50) icmp_seq=3 Destination Host Unreachable
From linux-rac01.ingresstest.com (192.168.20.50) icmp_seq=4 Destination Host Unreachable
— rac-scan.ingresstest.com ping statistics —
6 packets transmitted, 0 received, +3 errors, 100% packet loss, time 5000ms, pipe 3


[grid@linux-rac01 grid]$ ping rac-scan
PING rac-scan.ingresstest.com (192.168.50.104) 56(84) bytes of data.
From linux-rac01.ingresstest.com (192.168.20.50) icmp_seq=2 Destination Host Unreachable
From linux-rac01.ingresstest.com (192.168.20.50) icmp_seq=3 Destination Host Unreachable
From linux-rac01.ingresstest.com (192.168.20.50) icmp_seq=4 Destination Host Unreachable
 — rac-scan.ingresstest.com ping statistics —
11 packets transmitted, 0 received, +6 errors, 100% packet loss, time 10000ms, pipe 3


[grid@linux-rac01 grid]$ ping rac-scan
PING rac-scan.ingresstest.com (192.168.50.102) 56(84) bytes of data.
64 bytes from rac-scan.ingresstest.com (192.168.50.102): icmp_seq=1 ttl=64 time=0.039 ms
64 bytes from rac-scan.ingresstest.com (192.168.50.102): icmp_seq=2 ttl=64 time=0.054 ms
64 bytes from rac-scan.ingresstest.com (192.168.50.102): icmp_seq=3 ttl=64 time=0.049 ms
64 bytes from rac-scan.ingresstest.com (192.168.50.102): icmp_seq=4 ttl=64 time=0.063 ms


— rac-scan.ingresstest.com ping statistics —
4 packets transmitted, 4 received, 0% packet loss, time 3001ms
rtt min/avg/max/mdev = 0.039/0.051/0.063/0.010 ms


[grid@linux-rac01 grid]$ host rac-scan
rac-scan.ingresstest.com has address 192.168.50.104
rac-scan.ingresstest.com has address 192.168.50.103
rac-scan.ingresstest.com has address 192.168.50.102


[grid@linux-rac01 grid]$ nslookup rac-scan
Server: 192.168.21.3
Address: 192.168.21.3#53
Name: rac-scan.ingresstest.com
Address: 192.168.50.104
Name: rac-scan.ingresstest.com
Address: 192.168.50.102
Name: rac-scan.ingresstest.com
Address: 192.168.50.103


[grid@linux-rac01 grid]$
[root@linux-rac01 grid]# host rac-scan
rac-scan.ingresstest.com has address 192.168.50.104
rac-scan.ingresstest.com has address 192.168.50.103
rac-scan.ingresstest.com has address 192.168.50.102


Now if you see rac-scan is configured in DNS Server and helps in resolving 3 IP addresses given below with rac-scan.ingresstest.com.
 

192.168.50.104
192.168.50.103
192.168.50.102


Below is the snapshot of the tnsnames.ora file :


ORCL =
DESCRIPTION =
(ADDRESS = (PROTOCOL = TCP)(HOST = rac-scan.ingresstest.com)(PORT = 1525))
(CONNECT_DATA =
(SERVER = DEDICATED)
(SERVICE_NAME = orcl.ingresstest.com)
)
)


Above log represents that we have currently 1 scan listener and helps users request to connect database but only if the scan name is resolved to the working IP address.
 
rac-scan resolves either to 192.168.50.103 or 192.168.50.104

SQL> conn scott/tiger@orcl
Connection failed.
ERROR: ORA-12543: TNS:destination host unreachable


Connection established.rac-scan resolves to 192.168.50.102.

SQL>conn scott/tiger@orcl
connected
SQL>


So we are now going to add another 2 scan lister which will omit the above problem when it resolves with ip 103 and 104.

[grid@linux-rac01 grid]$ srvctl stop scan_listener

[grid@linux-rac01 grid]$ srvctl stop scan
[grid@linux-rac01 grid]$ srvctl config scan
SCAN name: rac-scan, Network: 1/192.168.20.0/255.255.255.0/eth2
SCAN VIP name: scan1, IP: /rac-scan.ingresstest.com/192.168.50.102
[grid@linux-rac01 grid]$ srvctl config scan_listener
SCAN Listener LISTENER_SCAN1 exists. Port: TCP:1525
[grid@linux-rac01 grid]$ which srvctl
/u01/home/11.2.0/grid/bin/srvctl

[root@linux-rac01 root]# /u01/home/11.2.0/grid/bin/srvctl modify scan -n rac-scan

NOTE: If the above step doesn't and resolves all the IP address try using full name. Make sure that if you are using full qualified name then the same needs to be modified in TNSNAMES.ORA FILE as well on APPLICATION SERVER.


[root@linux-rac01 root]# /u01/home/11.2.0/grid/bin/srvctl config scan
SCAN name: rac-scan, Network: 1/192.168.20.0/255.255.255.0/eth2
SCAN VIP name: scan1, IP: /rac-scan.ingresstest.com/192.168.50.103
SCAN VIP name: scan2, IP: /rac-scan.ingresstest.com/192.168.50.104
SCAN VIP name: scan3, IP: /rac-scan.ingresstest.com/192.168.50.102


[root@linux-rac01 root]# /u01/home/11.2.0/grid/bin/srvctl modify scan_listener -u


[root@linux-rac01 root]# /u01/home/11.2.0/grid/bin/srvctl config scan_listener
SCAN Listener LISTENER_SCAN1 exists. Port: TCP:1525
SCAN Listener LISTENER_SCAN2 exists. Port: TCP:1525
SCAN Listener LISTENER_SCAN3 exists. Port: TCP:1525

[root@linux-rac01 root]# /u01/home/11.2.0/grid/bin/srvctl start scan_listener

[root@linux-rac01 root]# /u01/home/11.2.0/grid/bin/srvctl config scan
SCAN name: rac-scan, Network: 1/192.168.20.0/255.255.255.0/eth2
SCAN VIP name: scan1, IP: /rac-scan.ingresstest.com/192.168.50.103
SCAN VIP name: scan2, IP: /rac-scan.ingresstest.com/192.168.50.104
SCAN VIP name: scan3, IP: /rac-scan.ingresstest.com/192.168.50.102

Once it is done you can check the status with SRVCTL command.


Check the Status of SCAN and SCAN_LISTENER:
 
[grid@linux-rac01 ~]$ srvctl status scan
SCAN VIP scan1 is enabled
SCAN VIP scan1 is running on node linux-rac01
SCAN VIP scan2 is enabled
SCAN VIP scan2 is running on node linux-rac02
SCAN VIP scan3 is enabled
SCAN VIP scan3 is running on node linux-rac02


[grid@linux-rac01 ~]$ srvctl status scan_listener
SCAN Listener LISTENER_SCAN1 is enabled
SCAN listener LISTENER_SCAN1 is running on node linux-rac01
SCAN Listener LISTENER_SCAN2 is enabled
SCAN listener LISTENER_SCAN2 is running on node linux-rac02
SCAN Listener LISTENER_SCAN3 is enabled
SCAN listener LISTENER_SCAN3 is running on node linux-rac02


Once the SCAN LISTENER is configured you can use tsnping and see if there is any database listening to that port.
 
Please let us know your feedback and comments.

Add SCAN LISTENER in 11g Release 2

I have built database server with single SCAN LISTENER for some testing purpose. Now I need to add other 2 SCAN LISTENER so was trying to do it with the SRVCTL Utility so here are the steps on how to add scan listener after doing entire built of database server with single SCAN LISTENER.

[grid@linux-rac01 grid]$ srvctl config scan

SCAN name: rac-scan, Network: 1/192.168.20.0/255.255.255.0/eth2
SCAN VIP name: scan1, IP: /rac-scan.bhaviktest.com/192.168.50.102
[grid@linux-rac01 grid]$ srvctl config scan_listener
SCAN Listener LISTENER_SCAN1 exists. Port: TCP:1525

[grid@linux-rac01 grid]$ ping rac-scan.bhaviktest.com
PING rac-scan.bhaviktest.com (192.168.50.103) 56(84) bytes of data.
From linux-rac01.bhaviktest.com (192.168.20.50) icmp_seq=2 Destination Host Unreachable
From linux-rac01.bhaviktest.com (192.168.20.50) icmp_seq=3 Destination Host Unreachable
From linux-rac01.bhaviktest.com (192.168.20.50) icmp_seq=4 Destination Host Unreachable
— rac-scan.bhaviktest.com ping statistics —
6 packets transmitted, 0 received, +3 errors, 100% packet loss, time 5000ms, pipe 3


[grid@linux-rac01 grid]$ ping rac-scan
PING rac-scan.bhaviktest.com (192.168.50.104) 56(84) bytes of data.
From linux-rac01.bhaviktest.com (192.168.20.50) icmp_seq=2 Destination Host Unreachable
From linux-rac01.bhaviktest.com (192.168.20.50) icmp_seq=3 Destination Host Unreachable
From linux-rac01.bhaviktest.com (192.168.20.50) icmp_seq=4 Destination Host Unreachable
 — rac-scan.bhaviktest.com ping statistics —
11 packets transmitted, 0 received, +6 errors, 100% packet loss, time 10000ms, pipe 3


[grid@linux-rac01 grid]$ ping rac-scan
PING rac-scan.bhaviktest.com (192.168.50.102) 56(84) bytes of data.
64 bytes from rac-scan.bhaviktest.com (192.168.50.102): icmp_seq=1 ttl=64 time=0.039 ms
64 bytes from rac-scan.bhaviktest.com (192.168.50.102): icmp_seq=2 ttl=64 time=0.054 ms
64 bytes from rac-scan.bhaviktest.com (192.168.50.102): icmp_seq=3 ttl=64 time=0.049 ms
64 bytes from rac-scan.bhaviktest.com (192.168.50.102): icmp_seq=4 ttl=64 time=0.063 ms


— rac-scan.bhaviktest.com ping statistics —
4 packets transmitted, 4 received, 0% packet loss, time 3001ms
rtt min/avg/max/mdev = 0.039/0.051/0.063/0.010 ms


[grid@linux-rac01 grid]$ host rac-scan
rac-scan.bhaviktest.com has address 192.168.50.104
rac-scan.bhaviktest.com has address 192.168.50.103
rac-scan.bhaviktest.com has address 192.168.50.102


[grid@linux-rac01 grid]$ nslookup rac-scan
Server: 192.168.21.3
Address: 192.168.21.3#53
Name: rac-scan.bhaviktest.com
Address: 192.168.50.104
Name: rac-scan.bhaviktest.com
Address: 192.168.50.102
Name: rac-scan.bhaviktest.com
Address: 192.168.50.103


[grid@linux-rac01 grid]$
[root@linux-rac01 grid]# host rac-scan
rac-scan.bhaviktest.com has address 192.168.50.104
rac-scan.bhaviktest.com has address 192.168.50.103
rac-scan.bhaviktest.com has address 192.168.50.102


Now if you see rac-scan is configured in DNS Server and helps in resolving 3 IP addresses given below with rac-scan.bhaviktest.com.
 

192.168.50.104
192.168.50.103
192.168.50.102


Below is the snapshot of the tnsnames.ora file :


ORCL =
DESCRIPTION =
(ADDRESS = (PROTOCOL = TCP)(HOST = rac-scan.bhaviktest.com)(PORT = 1525))
(CONNECT_DATA =
(SERVER = DEDICATED)
(SERVICE_NAME = orcl.bhaviktest.com)
)
)


Above log represents that we have currently 1 scan listener and helps users request to connect database but only if the scan name is resolved to the working IP address.
 
rac-scan resolves either to 192.168.50.103 or 192.168.50.104

SQL> conn scott/tiger@orcl
Connection failed.
ERROR: ORA-12543: TNS:destination host unreachable


Connection established.rac-scan resolves to 192.168.50.102.

SQL>conn scott/tiger@orcl
connected
SQL>


So we are now going to add another 2 scan lister which will omit the above problem when it resolves with ip 103 and 104.

[grid@linux-rac01 grid]$ srvctl stop scan_listener

[grid@linux-rac01 grid]$ srvctl stop scan
[grid@linux-rac01 grid]$ srvctl config scan
SCAN name: rac-scan, Network: 1/192.168.20.0/255.255.255.0/eth2
SCAN VIP name: scan1, IP: /rac-scan.bhaviktest.com/192.168.50.102
[grid@linux-rac01 grid]$ srvctl config scan_listener
SCAN Listener LISTENER_SCAN1 exists. Port: TCP:1525
[grid@linux-rac01 grid]$ which srvctl
/u01/home/11.2.0/grid/bin/srvctl

[root@linux-rac01 root]# /u01/home/11.2.0/grid/bin/srvctl modify scan -n rac-scan

NOTE: If the above step doesn't and resolves all the IP address try using full name. Make sure that if you are using full qualified name then the same needs to be modified in TNSNAMES.ORA FILE as well on APPLICATION SERVER.


[root@linux-rac01 root]# /u01/home/11.2.0/grid/bin/srvctl config scan
SCAN name: rac-scan, Network: 1/192.168.20.0/255.255.255.0/eth2
SCAN VIP name: scan1, IP: /rac-scan.bhaviktest.com/192.168.50.103
SCAN VIP name: scan2, IP: /rac-scan.bhaviktest.com/192.168.50.104
SCAN VIP name: scan3, IP: /rac-scan.bhaviktest.com/192.168.50.102


[root@linux-rac01 root]# /u01/home/11.2.0/grid/bin/srvctl modify scan_listener -u


[root@linux-rac01 root]# /u01/home/11.2.0/grid/bin/srvctl config scan_listener
SCAN Listener LISTENER_SCAN1 exists. Port: TCP:1525
SCAN Listener LISTENER_SCAN2 exists. Port: TCP:1525
SCAN Listener LISTENER_SCAN3 exists. Port: TCP:1525

[root@linux-rac01 root]# /u01/home/11.2.0/grid/bin/srvctl start scan_listener

[root@linux-rac01 root]# /u01/home/11.2.0/grid/bin/srvctl config scan
SCAN name: rac-scan, Network: 1/192.168.20.0/255.255.255.0/eth2
SCAN VIP name: scan1, IP: /rac-scan.bhaviktest.com/192.168.50.103
SCAN VIP name: scan2, IP: /rac-scan.bhaviktest.com/192.168.50.104
SCAN VIP name: scan3, IP: /rac-scan.bhaviktest.com/192.168.50.102

Once it is done you can check the status with SRVCTL command.


Check the Status of SCAN and SCAN_LISTENER:
 
[grid@linux-rac01 ~]$ srvctl status scan
SCAN VIP scan1 is enabled
SCAN VIP scan1 is running on node linux-rac01
SCAN VIP scan2 is enabled
SCAN VIP scan2 is running on node linux-rac02
SCAN VIP scan3 is enabled
SCAN VIP scan3 is running on node linux-rac02


[grid@linux-rac01 ~]$ srvctl status scan_listener
SCAN Listener LISTENER_SCAN1 is enabled
SCAN listener LISTENER_SCAN1 is running on node linux-rac01
SCAN Listener LISTENER_SCAN2 is enabled
SCAN listener LISTENER_SCAN2 is running on node linux-rac02
SCAN Listener LISTENER_SCAN3 is enabled
SCAN listener LISTENER_SCAN3 is running on node linux-rac02


Once the SCAN LISTENER is configured you can use tsnping and see if there is any database listening to that port.
 
Please let us know your feedback and comments.

How can I remove a URL on my website from the Google Index?

To remove a specific URL (for example, the page http://www.example.com/page4.html) of your own website from Google’s index, there are two ...