Solution 1
Increase the value of the parameter "max_enabled_roles".
Solution 2
A user has too many roles allocated, and it doesn't need all that roles. When you CREATE ROLE the role is granted by default to the creating user, but the creating user doesn't necessarily need to be granted the role. Perhaps you could just revoke some roles from the user that has more than the maximum?
select grantee, count (*) from dba_role_privs group by grantee having count (*) > (your maximum) ;

Friday, September 28, 2007
Creating Database Link
A database link is a schema object in one database that enables you to access objects on another database. The other database need not be an Oracle Database system.
CREATE [SHARED][PUBLIC] DATABASE LINK link_name [CONNECT TO user IDENTIFIED BY password] [AUTHENTICATED BY user IDENTIFIED BY password] [USING 'connect_string']
CREATE [SHARED][PUBLIC] DATABASE LINK link_name [CONNECT TO user IDENTIFIED BY password] [AUTHENTICATED BY user IDENTIFIED BY password] [USING 'connect_string']
Friday, September 21, 2007
oracle 8i Installer Not Starting
Below are the steps which will help you to Start Oracl e8i Universal Installer
1. Search for all copies of the 'symcjit.dll' file
(Start>>Search>>Files and folders)
2. Rename them to symcjit.old'.
3. Go to the install directory on your hard disk and open the 'oraparam.ini' file for editing.(file is write-protected).
4. Change the JRE_MEMORY_OPTIONS parameter to: JRE_MEMORY_OPTIONS=-nojit -ms16m -mx32m
And Now Double Click on your Setup.exe file ... Enjoy!!!
Monday, September 17, 2007
WITH Clause - Oracle SQL
Starting in Oracle9i release 2 we see an incorporation of the SQL-99 “WITH clause”, a tool for materializing subqueries to save Oracle from having to re-compute them multiple times.
The SQL “WITH clause” is very similar to the use of Global temporary tables (GTT), a technique that is often used to improve query speed for complex subqueries. Here are some important notes about the Oracle “WITH clause”:
• The SQL “WITH clause” only works on Oracle 9i release 2 and beyond.
• Formally, the “WITH clause” is called subquery factoring
• The SQL “WITH clause” is used when a subquery is executed multiple times
• Also useful for recursive queries (SQL-99, but not Oracle SQL)
To keep it simple, the following example only references the aggregations once, where the SQL “WITH clause” is normally used when an aggregation is referenced multiple times in a query.
We can also use the SQL-99 “WITH clause” instead of temporary tables. The Oracle SQL “WITH clause” will compute the aggregation once, give it a name, and allow us to reference it (maybe multiple times), later in the query.
The SQL-99 “WITH clause” is very confusing at first because the SQL statement does not begin with the word SELECT. Instead, we use the “WITH clause” to start our SQL query, defining the aggregations, which can then be named in the main query as if they were “real” tables:
WITH subquery_nameAS(the aggregation SQL statement)SELECT(query naming
subquery_name);
Retuning to our oversimplified example, let’s replace the temporary tables with the SQL “WITH clause” (Note: You may find a faster execution plan by using Global Temporary tables, depending on your release of Oracle):
WITH sum_sales AS ( select /*+ materialize */
sum(quantity) all_sales from stores )number_stores AS ( select /*+
materialize */ count(*) nbr_stores from stores
)sales_by_store AS ( select /*+ materialize */ store_name,
sum(quantity) store_sales from store natural join sales
)SELECT store_nameFROM store,
sum_sales, number_stores,
sales_by_storewhere store_sales > (all_sales / nbr_stores);
Note the use of the Oracle undocumented “materialize” hint in the “WITH clause”. The Oracle materialize hint is used to ensure that the Oracle cost-based optimizer materializes the temporary tables that are created inside the “WITH” clause. This is not necessary in Oracle10g, but it helps ensure that the tables are only created one time.
It should be noted that the “WITH clause” does not yet fully-functional within Oracle SQL and it does not yet support the use of “WITH clause” replacement for “CONNECT BY” when performing recursive queries.
To see how the “WITH clause” is used in ANSI SQL-99 syntax, here is an excerpt from Jonathan Gennick’s great work “Understanding the WITH Clause” showing the use of the SQL-99 “WITH clause” to traverse a recursive bill-of-materials hierarchy The SQL-99 “WITH clause” is very confusing at first because the SQL statement does not begin with the word SELECT.
Instead, we use the “WITH clause” to start our SQL query, defining the aggregations, which can then be named in the main query as if they were “real” tables:
WITH subquery_nameAS(the aggregation SQL statement)SELECT(query
naming subquery_name);
Retuning to our oversimplified example, let’s replace the temporary tables with the SQL “WITH” clause”:
CPU APRIL 2007 Patch
Oracle has released April 2007 CPU Patch which fixes for 37 security flaws across all its products.
The fixes are delivered as part of Oracle’s quarterly patch cycle. Seven of the bugs are serious and could allow a system running the vulnerable Oracle software to be compromised remotely, the company said in a note on its website
Oracle’s “Critical Patch Update” is planned to include 13 fixes for Oracle database products, five for Application Server, 11 for E-Business Suite, and four for PeopleSoft and J.D. Edwards products, according to the company note
Setting Listener Password
One of the biggest loophole that an Oracle database installation can have is Oracle Listener without a password. At the time of client server this fact somehow can be overlooked as we know who our user are, but now in days of web we don’t them so its becomes very important that we secure Oracle Listener.
Setting the password for the listener can be done in following three ways:
1. Editing the listener.ora file and setting the password in it.
2. Using LSNRCTL utility.
3. Through Oracle Graphical tools such as Net Manager, Oracle Enterprise Manager and so on.
In this blog entry I will mainly concentrate on first two.
Under first method we can edit the listener.ora file and add the following line in it.
PASSWORDS_LISTENER = imergegroup and then restart the listener.
But the drawback with this method is that password is stored in plain text format without encryption.
In Second method, we can run LSNRCTL utility and then can give command as follows:
LSNRCTL>change_password
After it it will prompt your for old password, if it is there you can type in or press enter.
Then it will prompt you for the new password which you want to set and then press enter.
Then it will again prompt you to reenter the new password for confirmation and then press enter.
After this password will be changes for running instance or session of the listener.
If we want it applicable for all the future instance or session we need to save the configuration for future use as follows:
LSNRCTL> set password
LSNRCTL> save_config
One these steps are completed, if we open listener.ora file we will notice that same line as we add in first method is added but password is in encrypted format.
Interval Partitioning: A new partitioning strategy in Oracle Database 11g
One more features which really look interesting and I will be looking forward to implement it is, A new partitioning strategy in Oracle Database 11g, Interval partitioning extends the capabilities of the range method to define equipartitioned ranges using an interval definition. Rather than specifying individual ranges explicitly, Oracle will create any partition automatically as-needed whenever data for a partition is inserted for the very first time. Interval partitioning greatly improves the manageability of a partitioned table.
For Example:
An interval partitioned table could be defined so that Oracle creates a new partition for every month in a calendar year; a partition is then automatically created for new month as soon as the first record for that month is inserted into the database.
For Example:
An interval partitioned table could be defined so that Oracle creates a new partition for every month in a calendar year; a partition is then automatically created for new month as soon as the first record for that month is inserted into the database.
Wednesday, April 11, 2007
SOLVING ORACLE DATA BLOCK CORRUPTION
0. Abstract
Whenever you encounter the following Oracle error messages,
ORA-00600: Internal message code, arguments: [01578] [...] [...] [] [] [].
ORA-01578: Oracle data block corrupted (file ..., block ...).
you are faced with, what at first sight looks like, a very serious problem. Somewhere in your database a block of data has been corrupted (at the byte-level) in such a way that the Oracle server causes the above internal exception to be raised each time a SQL-statement accesses (reads or writes) that block.
This paper will describe the options that are available to you for solving the ORA-00600[01578] error. We will see that in most cases the above problem can be easily and quickly solved, and that in much fewer cases more effort and time will be neccessary to solve the problem.
1. Introduction
Having encountered the Oracle data block corruption, we must firstly investigate which database segment (name and type) the corrupted block is allocated to. Chances are that the block belongs either to an index or to a table segment, since these two type of segments fill the major part of our databases. The following query will reveil the segment that holds the corrupted block identified by and (which were given to you in the error message):
select ds.*
from dba_segments ds, sys.uet$ e
where ds.header_file=e.segfile#
and ds.header_block=e.segblock#
and e.file#=
and between e.block# and e.block#+e.length-1;
If the segment turns out to be an index segment, then the problem can be very quickly solved. Since all the table data required for recreating the index is still accessable, we can drop and recreate the index (since the block will reformatted, when taken from the free-space list and reused for the index).
If the segment turns out to be a table segment a number of options for solving the problem are available:
- Using datafile backups and archived redo logfiles we could do a recovery of the datafile that holds the corrupt data block. We must be sure though that the data block was not already corrupted in the backup datafile.
This option involves a lot of effort: shutting down the database, restoring an old enough datafile, then recover that datafile by applying multiple archived logfiles and restarting the database. It will however restore our corrupted table segment completely up to the time when we discovered the corrupt data block.
- If we regularly made dumpfiles using the Export-utility, another option could be to restore the table segment using the Import-utility. Of course this can only be done if the version of the table as recorded in the dumpfile is acceptable (ie. not too old) compared to other related tables in our database. Before doing the table import we would have to truncate the current table which deallocates the bad block.
- The last option involves using SQL to select as much data as possible from the current corrupted table segment and save the selected rows into a new table.
Selecting data that is stored in segment blocks that preceede the corrupted block can be easily done using a full table scan (via a cursor). Rows stored in blocks after the corrupted block cause a problem. A full table scan will never reach these. However these rows can still be fetched using rowids (single row lookups).
The next section will investigate the third option more closely. Part of the trick is to find out what the rowid's are of the rows that lie behind the corrupted block. The presence of an index on the corrupted table will aid us a lot in this area.
2. Table data recovery using SQL
2.1 Table was indexed
Suppose the table was indexed, which is a very likely assumption since every table should have a primary key and primary keys are implemented using unique indexes. The index contains pointers (rowid's) to each row in our corrupted table which can be used to directly access rows that are stored after the corrupt data block in the table segment.
Using an optimizer hint we can write a query that selects the rows from the table via an index scan (using rowid's), instead of via a full table scan. Let's assume our table is named X with columns a, b and c. And table X is indexed uniquely on columns a and b by index X_I, the query would look like:
select /*+index(X X_I) */ a, b, c
from X;
The execution plan for this query is:
Select statement
>table access (by rowid) X
>index range scan X_I
We must now exclude the corrupt block from being accessed to avoid the internal exception ORA-00600[01578]. Since the blocknumber is a substring of the rowid ([1]) this can very easily be achieved:
select /*+index(X X_I) */ a, b, c
from X
where rowid not like'.%.';
The execution plan for this query stays the same:
Select statement
>table access (by rowid) X
>index range scan X_I
But it is important to realize that the where-clause gets evaluated right after the index is accessed and before the table is accessed. Otherwise we would still get the ORA-00600[01578] exception. Using the above query as a subquery in an insert statement we can restore all rows of still valid blocks to a new table.
Since the index holds the actual column values of the indexed columns we could also use the index to restore all indexed columns of rows that reside in the corrupt block. The following query,
select /*+index(X X_I) */ a, b
from X
where rowid like'.%.';
retreives only indexed columns a and b from rows inside the corrupt block. The optimizer will not access the table for this query. It can retreive the column values using the index segment only. The execution plan for the above query is:
Select statement
>index range scan X_I
Using this technique we are able to restore all indexed column values of the rows inside the corrupt block, without accessing the corrupt block at all. Suppose in our example that column c of table X was also indexed by index X_I2. This enables us to completely restore rows inside the corrupt block.
First restore columns a and b using index X_I:
create table X_a_b(rowkey,a,b) as
select /*+index(X X_I) */ rowid, a, b
from X
where rowid like'.%.';
Then restore column c using index X_I2:
create table X_c(rowkey,c) as
select /*+index(X X_I2) */ rowid, c
from X
where rowid like'.%.';
And finally join the columns together using the restored rowid:
select x1.a, x1.b, x2.c
from X_a_b x1, X_c x2
where x1.rowkey=x2.rowkey;
In summary:
Indexes on the corrupted table segment can be used to restore all columns of all rows that are stored outside the corrupted data blocks. Of rows inside the corrupted data blocks, only the columns that were indexed can be restored. We might even be able to use an old version of the table (via Import) to further restore non-indexed columns of these records.
2.2 Table has no indexes
This situation should rarely occur since every table should have a primary key and therefore a unique index. However when no index is present, all rows of corrupted blocks should be considered lost. All other rows can be retrieved using rowid's. Since there is no index we must build a rowid generator ourselves. The SYS.UET$ table shows us exactly which extents (file#, startblock, endblock) we need to inspect for possible rows of our table X. If we make an estimate of the maximum number of rows per block for table X, we can build a PL/SQL-loop that generates possible rowid's of records inside table X. By handling the 'invalid rowid' exception, and skipping the corrupted data block, we can restore all rows except those inside the corrupted block.
declare
v_rowid varchar2(18);
v_xrec X%rowtype;
e_invalid_rowid exception;
pragma exception_init(e_invalid_rowid,-1410);
begin for v_uetrec in (select file# file, block# start_block, block#+length#-1 end_block
from uet$
where segfile#=6 and segblock#=64) -- Identifies our segment X.
loop for v_blk in v_uetrec.start_block..v_uetrec.end_block
loop if v_uetrec.file<>6 and v_blk<>886 -- 886 in file 6 is our corrupted block.
then for v_row in 0..200 -- 200 is maximum number of rows per block for segment X.
loop begin select a,b,c into v_rec
from x
where rowid=chartorowid('0000'hex(v_blk)'.'
hex(v_row)'.'hex(v_uetrec.file);
insert into x_saved(a,b,c) values(v_rec.a,v_rec.b,v_rec.c);
commit;
exception when e_invalid_rowid then null;
end;
end loop; /*row-loop*/
end if;
end loop; /*blk-loop*/
end loop; /*uet-loop*/
end;
/
The above code assumes that block id's never exceed 4 hexadecimal places. A definition of the hex-function which is used in the above code can be found in the appendix.
3. Conclusion
Solving Oracle data block corruption is hopefully not an every day task for you. As we have shown in this short paper the solution is very straightforward. In many situations almost all data can be restored from corrupted data segments. The presence of an index on the corrupted table segment greatly aids in restoring the data, since it not only supplies us with all the rowid's, but also holds column values of rows that cannot be accessed inside the table segment.
Appendix: function HEX.
Function hex accepts a decimal number and returns the hexadecimal representation of this number.
create or replace function hex(v_num in binary_integer) return varchar2 as
-- Assumption: 'v_num' is less than power(16,4).
v_tmp3 binary_integer; v_tmp2 binary_integer;
v_tmp1 binary_integer; v_tmp0 binary_integer;
v_buf binary_integer;
function hexchr(v_c in binary_integer) return varchar2 as
begin if v_c between 0 and 9 then return to_char(v_c);
elsif v_c=10 then return 'A'; elsif v_c=11 then return 'B';
elsif v_c=12 then return 'C'; elsif v_c=13 then return 'D';
elsif v_c=14 then return 'E'; elsif v_c=15 then return 'F';
end if;
end;
function div(i in binary_integer, j in binary_integer) return binary_integer as
v_buf binary_integer:=i; a binary_integer:=0;
begin while v_buf>=j
loop a:=a+1; v_buf:=v_buf‑j; end loop;
return a;
end;
begin v_buf:=v_num;
v_tmp3:=div(v_buf,4096); v_buf:=v_buf‑4096*v_tmp3;
v_tmp2:=div(v_buf,256); v_buf:=v_buf‑256*v_tmp2;
v_tmp1:=div(v_buf,16); v_buf:=v_buf‑16*v_tmp1;
v_tmp0:=v_buf;
return hexchr(v_tmp3)hexchr(v_tmp2)hexchr(v_tmp1)hexchr(v_tmp0);
end;
/
[1] A rowid holds the physical address of a row. Its value is formatted as follows: 'xxxxxxxx.yyyy.zzz'. The first part (x) equals the block offset within the datafile. The second part (y) equals the row offset within the data block. The last part (z) identifies the datafile. All values are in hexadecimal representation.
Whenever you encounter the following Oracle error messages,
ORA-00600: Internal message code, arguments: [01578] [...] [...] [] [] [].
ORA-01578: Oracle data block corrupted (file ..., block ...).
you are faced with, what at first sight looks like, a very serious problem. Somewhere in your database a block of data has been corrupted (at the byte-level) in such a way that the Oracle server causes the above internal exception to be raised each time a SQL-statement accesses (reads or writes) that block.
This paper will describe the options that are available to you for solving the ORA-00600[01578] error. We will see that in most cases the above problem can be easily and quickly solved, and that in much fewer cases more effort and time will be neccessary to solve the problem.
1. Introduction
Having encountered the Oracle data block corruption, we must firstly investigate which database segment (name and type) the corrupted block is allocated to. Chances are that the block belongs either to an index or to a table segment, since these two type of segments fill the major part of our databases. The following query will reveil the segment that holds the corrupted block identified by
select ds.*
from dba_segments ds, sys.uet$ e
where ds.header_file=e.segfile#
and ds.header_block=e.segblock#
and e.file#=
and
If the segment turns out to be an index segment, then the problem can be very quickly solved. Since all the table data required for recreating the index is still accessable, we can drop and recreate the index (since the block will reformatted, when taken from the free-space list and reused for the index).
If the segment turns out to be a table segment a number of options for solving the problem are available:
- Using datafile backups and archived redo logfiles we could do a recovery of the datafile that holds the corrupt data block. We must be sure though that the data block was not already corrupted in the backup datafile.
This option involves a lot of effort: shutting down the database, restoring an old enough datafile, then recover that datafile by applying multiple archived logfiles and restarting the database. It will however restore our corrupted table segment completely up to the time when we discovered the corrupt data block.
- If we regularly made dumpfiles using the Export-utility, another option could be to restore the table segment using the Import-utility. Of course this can only be done if the version of the table as recorded in the dumpfile is acceptable (ie. not too old) compared to other related tables in our database. Before doing the table import we would have to truncate the current table which deallocates the bad block.
- The last option involves using SQL to select as much data as possible from the current corrupted table segment and save the selected rows into a new table.
Selecting data that is stored in segment blocks that preceede the corrupted block can be easily done using a full table scan (via a cursor). Rows stored in blocks after the corrupted block cause a problem. A full table scan will never reach these. However these rows can still be fetched using rowids (single row lookups).
The next section will investigate the third option more closely. Part of the trick is to find out what the rowid's are of the rows that lie behind the corrupted block. The presence of an index on the corrupted table will aid us a lot in this area.
2. Table data recovery using SQL
2.1 Table was indexed
Suppose the table was indexed, which is a very likely assumption since every table should have a primary key and primary keys are implemented using unique indexes. The index contains pointers (rowid's) to each row in our corrupted table which can be used to directly access rows that are stored after the corrupt data block in the table segment.
Using an optimizer hint we can write a query that selects the rows from the table via an index scan (using rowid's), instead of via a full table scan. Let's assume our table is named X with columns a, b and c. And table X is indexed uniquely on columns a and b by index X_I, the query would look like:
select /*+index(X X_I) */ a, b, c
from X;
The execution plan for this query is:
Select statement
>table access (by rowid) X
>index range scan X_I
We must now exclude the corrupt block from being accessed to avoid the internal exception ORA-00600[01578]. Since the blocknumber is a substring of the rowid ([1]) this can very easily be achieved:
select /*+index(X X_I) */ a, b, c
from X
where rowid not like
The execution plan for this query stays the same:
Select statement
>table access (by rowid) X
>index range scan X_I
But it is important to realize that the where-clause gets evaluated right after the index is accessed and before the table is accessed. Otherwise we would still get the ORA-00600[01578] exception. Using the above query as a subquery in an insert statement we can restore all rows of still valid blocks to a new table.
Since the index holds the actual column values of the indexed columns we could also use the index to restore all indexed columns of rows that reside in the corrupt block. The following query,
select /*+index(X X_I) */ a, b
from X
where rowid like
retreives only indexed columns a and b from rows inside the corrupt block. The optimizer will not access the table for this query. It can retreive the column values using the index segment only. The execution plan for the above query is:
Select statement
>index range scan X_I
Using this technique we are able to restore all indexed column values of the rows inside the corrupt block, without accessing the corrupt block at all. Suppose in our example that column c of table X was also indexed by index X_I2. This enables us to completely restore rows inside the corrupt block.
First restore columns a and b using index X_I:
create table X_a_b(rowkey,a,b) as
select /*+index(X X_I) */ rowid, a, b
from X
where rowid like
Then restore column c using index X_I2:
create table X_c(rowkey,c) as
select /*+index(X X_I2) */ rowid, c
from X
where rowid like
And finally join the columns together using the restored rowid:
select x1.a, x1.b, x2.c
from X_a_b x1, X_c x2
where x1.rowkey=x2.rowkey;
In summary:
Indexes on the corrupted table segment can be used to restore all columns of all rows that are stored outside the corrupted data blocks. Of rows inside the corrupted data blocks, only the columns that were indexed can be restored. We might even be able to use an old version of the table (via Import) to further restore non-indexed columns of these records.
2.2 Table has no indexes
This situation should rarely occur since every table should have a primary key and therefore a unique index. However when no index is present, all rows of corrupted blocks should be considered lost. All other rows can be retrieved using rowid's. Since there is no index we must build a rowid generator ourselves. The SYS.UET$ table shows us exactly which extents (file#, startblock, endblock) we need to inspect for possible rows of our table X. If we make an estimate of the maximum number of rows per block for table X, we can build a PL/SQL-loop that generates possible rowid's of records inside table X. By handling the 'invalid rowid' exception, and skipping the corrupted data block, we can restore all rows except those inside the corrupted block.
declare
v_rowid varchar2(18);
v_xrec X%rowtype;
e_invalid_rowid exception;
pragma exception_init(e_invalid_rowid,-1410);
begin for v_uetrec in (select file# file, block# start_block, block#+length#-1 end_block
from uet$
where segfile#=6 and segblock#=64) -- Identifies our segment X.
loop for v_blk in v_uetrec.start_block..v_uetrec.end_block
loop if v_uetrec.file<>6 and v_blk<>886 -- 886 in file 6 is our corrupted block.
then for v_row in 0..200 -- 200 is maximum number of rows per block for segment X.
loop begin select a,b,c into v_rec
from x
where rowid=chartorowid('0000'hex(v_blk)'.'
hex(v_row)'.'hex(v_uetrec.file);
insert into x_saved(a,b,c) values(v_rec.a,v_rec.b,v_rec.c);
commit;
exception when e_invalid_rowid then null;
end;
end loop; /*row-loop*/
end if;
end loop; /*blk-loop*/
end loop; /*uet-loop*/
end;
/
The above code assumes that block id's never exceed 4 hexadecimal places. A definition of the hex-function which is used in the above code can be found in the appendix.
3. Conclusion
Solving Oracle data block corruption is hopefully not an every day task for you. As we have shown in this short paper the solution is very straightforward. In many situations almost all data can be restored from corrupted data segments. The presence of an index on the corrupted table segment greatly aids in restoring the data, since it not only supplies us with all the rowid's, but also holds column values of rows that cannot be accessed inside the table segment.
Appendix: function HEX.
Function hex accepts a decimal number and returns the hexadecimal representation of this number.
create or replace function hex(v_num in binary_integer) return varchar2 as
-- Assumption: 'v_num' is less than power(16,4).
v_tmp3 binary_integer; v_tmp2 binary_integer;
v_tmp1 binary_integer; v_tmp0 binary_integer;
v_buf binary_integer;
function hexchr(v_c in binary_integer) return varchar2 as
begin if v_c between 0 and 9 then return to_char(v_c);
elsif v_c=10 then return 'A'; elsif v_c=11 then return 'B';
elsif v_c=12 then return 'C'; elsif v_c=13 then return 'D';
elsif v_c=14 then return 'E'; elsif v_c=15 then return 'F';
end if;
end;
function div(i in binary_integer, j in binary_integer) return binary_integer as
v_buf binary_integer:=i; a binary_integer:=0;
begin while v_buf>=j
loop a:=a+1; v_buf:=v_buf‑j; end loop;
return a;
end;
begin v_buf:=v_num;
v_tmp3:=div(v_buf,4096); v_buf:=v_buf‑4096*v_tmp3;
v_tmp2:=div(v_buf,256); v_buf:=v_buf‑256*v_tmp2;
v_tmp1:=div(v_buf,16); v_buf:=v_buf‑16*v_tmp1;
v_tmp0:=v_buf;
return hexchr(v_tmp3)hexchr(v_tmp2)hexchr(v_tmp1)hexchr(v_tmp0);
end;
/
[1] A rowid holds the physical address of a row. Its value is formatted as follows: 'xxxxxxxx.yyyy.zzz'. The first part (x) equals the block offset within the datafile. The second part (y) equals the row offset within the data block. The last part (z) identifies the datafile. All values are in hexadecimal representation.
Tuesday, April 10, 2007
How to Release Lock on Table
Here is the query how to release the Lock on the table when we find there is a lock on the particular table..
ALTER TABLE ENABLE/DISABLE TABLE LOCK
ALTER TABLE
Thursday, March 29, 2007
Redo Logfile Size Advisor
The Redo Logfile Size Advisor can be used to determine the least optimal online redo log file size based on the current FAST_START_MTTR_TARGET setting and MTTR statistics.Which means that Redo Logfile Size Advisor is enabled only if FAST_START_MTTR_TARGET is set.
The Advisor provides a recommended optimal smallest online redo log file size.we can then adjust the online redo log file size to the recommended optimal size ,eliminating the need to manually determine an optimal size.
To use the advisor we need to query the V$INSTANCE_RECOVERY VIEW.
If our redo log file size is under sized then the checkpoint process is driven by WRITES_LOGFILE_SIZE i.e. its driven by the smallest redo log file size.
This can be clarified by quering the V$INSTANCE_RECOVERY VIEW.
Lets say one of our Log file is too small and we have set the FAST_START_MTTR_TARGET=30
We have done some Transactions which has generated redo entries , now we would like to capture the minimum optimal size of the redo log file.
SELECT TARGET_MTTR,ESTIMATED_MTTR,WRITES_MTTR,WRITES_LOGFILE_SIZE,
OPTIMAL_LOGFILE_SIZE FROM V$INSTANCE_RECOVERY;
TARGET_MTTR ESTIMATED_MTTR WRITES_MTTR WRITES_LOGFILE_SIZE OPTIMAL_LOGFILE_SIZE
----------- -------------- ----------- -------------------------------------
30 28 0 102232
Its clear from the above query that the chekpoint is driven by WRITES_LOGFILE_SIZE as described above and the advice is to have a Log file size of atleast 32MB Size.
Now if we recreate the log file with the size recommendation ie 32 MB and fire the same query again lets see what happens
SELECT TARGET_MTTR,ESTIMATED_MTTR,WRITES_MTTR,WRITES_LOGFILE_SIZE, OPTIMAL_LOGFILE_SIZE FROM V$INSTANCE_RECOVERY;
TARGET_MTTR ESTIMATED_MTTR WRITES_MTTR WRITES_LOGFILE_SIZE
OPTIMAL_LOGFILE_SIZE
----------- -------------- ----------- -------------------
--------------------
34 38 924 0
32
This shows that the checkpoint is now driven by WRITES_MTTR ie the FAST_START_MTTR parameter.
CAVEAT: An online redo log file’s size is considered optimal if it does not drive incremental checkpointing more aggressively than needed by FAST_START_MTTR_TARGET.
Tuesday, March 27, 2007
Rename an Oracle Database
Below Mentioned Steps will help you to rename an oracle Database
- Start by making a full database backup of your database (in case you need to restore if this procedure is not working).
- Execute this command from sqlplus while connected to 'SYS AS SYSDBA':
ALTER DATABASE BACKUP CONTROLFILE TO TRACE RESETLOGS;
- Locate the latest dump file in your USER_DUMP_DEST directory (show parameter USER_DUMP_DEST) - rename it to something like dbrename.sql.
- Edit dbrename.sql, remove all headers and comments, and change the database's name. Also change "CREATE CONTROLFILE REUSE ..." to "CREATE CONTROLFILE SET ...".
- Shutdown the database (use SHUTDOWN NORMAL or IMMEDIATE, don't ABORT!) and run dbrename.sql.
- Rename the database's global name:
ALTER DATABASE RENAME GLOBAL_NAME TO new_db_name;
What is inside X$tables in Oracle
The below mentioned list may not be complete or accurate, but represents an attempt to figure out what information they contain. I suggest not write queries against these tables as they are internal to Oracle, and Oracle may change them without any prior notification.
X$K2GTE2
Kernel 2 Phase Commit Global Transaction Entry Fixed Table
X$K2GTE
Kernel 2 Phase Commit Global Transaction Entry Fixed Table
X$BH
Buffer headers contain information describing the current contents of a piece of the buffer cache.
X$KCBCBH
Cache Buffer Current Buffer Header Fixed Table. It can predict the potential oss of decreasing the number of database buffers. The db_block_lru_statistics parameter has to be set to true to gather information in this table.
X$KCVFH
File Header Fixed Table
X$KDNCE
SGA Cache Entry Fixed Table
X$KDNST
Sequence Cache Statistics Fixed Table
X$KDXHS
Histogram structure Fixed Table
X$KDXST
Statistics collection Fixed Table
X$KGHLU
One-row summary of LRU statistics for the shared pool
X$KGLBODY
Derived from X$KGLOB (col kglhdnsp = 2)
X$KGLCLUSTER
Derived from X$KGLOB (col kglhdnsp = 5)
Derived from X$KGLOB (col kglhdnsp = 5)
X$KGLINDEX
Derived from X$KGLOB (col kglhdnsp = 4)
Derived from X$KGLOB (col kglhdnsp = 4)
X$KGLLC
Latch Clean-up state for library cache objects Fixed Table
Latch Clean-up state for library cache objects Fixed Table
X$KGLPN
Library cache pin Fixed Table
Library cache pin Fixed Table
X$KGLTABLE
Derived from X$KGLOB (col kglhdnsp = 1)
Derived from X$KGLOB (col kglhdnsp = 1)
X$KGLTR
Library Cache Translation Table entry Fixed Table
Library Cache Translation Table entry Fixed Table
X$KGLTRIGGER
Derived from X$KGLOB (col kglhdnsp = 3)
Derived from X$KGLOB (col kglhdnsp = 3)
X$KGLXS
Library Cache Access Table
Library Cache Access Table
X$KKMMD
Fixed table to look at what databases are mounted and their status
Fixed table to look at what databases are mounted and their status
X$KKSBV
Cursor Cache Bind Variables
Cursor Cache Bind Variables
X$KSMSP
Each row represents a piece of memory in the shared pool
Each row represents a piece of memory in the shared pool
X$KSQDN
Global database name
Global database name
X$KSQST
Enqueue statistics by type
Enqueue statistics by type
X$KSUCF
Cost function for each Kernel Profile (join to X$KSUPL)
Cost function for each Kernel Profile (join to X$KSUPL)
X$KSUPL
Resource Limit for each Kernel Profile
Resource Limit for each Kernel Profile
X$KSURU
Resource Usage for each Kernel Profile (join with X$KSUPL)
Resource Usage for each Kernel Profile (join with X$KSUPL)
X$KSQST
Gets and waits for different types of enqueues
Gets and waits for different types of enqueues
X$KTTVS
indicate tablespace that has valid save undo segments
indicate tablespace that has valid save undo segments
X$KVII
Internal instance parameters set at instance initialization
Internal instance parameters set at instance initialization
X$KVIS
Oracle Data Block (size_t type) variables
Oracle Data Block (size_t type) variables
X$KVIT
Instance internal flags, variables and parameters that can change during the life of an instance
Instance internal flags, variables and parameters that can change during the life of an instance
X$KXFPCDS
Client Dequeue Statistics
Client Dequeue Statistics
X$KXFPCMS
Client Messages Statistics
Client Messages Statistics
X$KZDOS
Represent an os role as defined by the operating system
Represent an os role as defined by the operating system
X$KZSRO
Security state Role: List of enabled roles
Security state Role: List of enabled roles
X$LE
Lock Element : each PCM lock that is used by the buffer cache (gc_db_locks)
Lock Element : each PCM lock that is used by the buffer cache (gc_db_locks)
X$MESSAGES
Displays all the different messages that can be sent to the Background processes
Displays all the different messages that can be sent to the Background processes
X$NLS_PARAMETERS
NLS database parameters
NLS database parameters
Monday, March 26, 2007
Make your Windows Faster & Smoother...
Disable unnecessary programs When you install some programs they will insert themselves into an area of your registry that will cause them to load when your computer starts up. Obviously this will use memory and slow down your system.
1. Start Regedit.
2. Navigate to HKEY_CURRENT_USER\Software\Microsoft\Windows\Curre ntVersion\ Run
3. Once there, locate any entry's on the right. You can identify the program by the path to the executable. Find programs that you can live without starting up from the list.
4. Right click on them and select Delete
5. You may also want to navigate to HKEY_CURRENT_USER\Software\Microsoft\Windows\Curre ntVersion\ Runonce and HKEY_LOCAL_MACHINE\SOFTWARE\Microsoft\Windows\Curr entVersion \Run.
6. Delete unnecessary programs.
7. Also go to START - PROGRAMS - STARTUP and see if there is anything there you wish to remove.
8. Reboot your computer.
Modify application timeout The operating system has a set amount of time that a program must be frozen for before it is timed out. Often this number is set too high, but in some circumstances it is set too low.
If the program is doing a lot of calculations in the background the computer may think that it is timed out. To prevent this, increase the value of the timeout in the registry.
1. Start Regedit. If you are unfamiliar with regedit please refer to our FAQ on how to get started.
2. Navigate to HKEY_CURRENT_USER\Control Panel\Desktop
3. Select HungAppTimeout from the list on the right.
4. Right on it and select Modify.
5. Change the value to the new timeout value.
6. Reboot your computer.
Open Outlook Express faster For some users when they remove windows messenger or just disable it from starting up automatically they experience a great slow down when launching Outlook express. Users who experience such a slow down will find a error in the system error log saying The server {FB7199AB-79BF-11D2-8D94-0000F875C541} did not register with DCOM within the required timeout. The solution to this problem is quite simple. Just Open up regedit and search for the string {FB7199AB-79BF-11D2-8D94-0000F875C541} and modify the keys InProcServer32 and LocalServer32 default key to a empty string.
Disable unnecessary services to free system resources
Services are programs that run when the computer starts up and continue to run as they aid the operating system in functionality. There are many services that load and are not needed which take up memory space and CPU time. Disabling these services will free up system resources which will speed up your overall computer experience. I recommend that you sort through the list and read the descriptions to decide if you need that service depending on what you want to do with your computer. Remember, you can always turn the service back on if you find that you need it in the future. Below is the procedure to turn off a service.
1. Click the start button.
2. Select run from the bottom of the right column.
3. Then type services.msc in the box and click ok.
4. Once the services window has loaded we are ready to turn off unneeded services.
5. For instructional purposes we are going to turn off the Portable Media Serial Number service.
6. Find this service in the list and select it with the mouse.
7. Right click and select Properties.
8. Once the properties windows has loaded locate the Start up type drop down box and select disable.
9. Then just click ok and the next time the computer starts the service will not be loaded.
System Settings for a Game Machine
Sunday, March 25, 2007
How to Find Over-all Database Size?
Big Portion of the database size comes from Datafiles.
To find out the size allocated to datafiles you can use below mentioned query :
1) select sum(bytes)/1024/1024 "Meg" from dba_data_files;
To get the size of all Temporary Files :
2) select nvl(sum(bytes),0)/1024/1024 "Meg" from dba_temp_files;
To get the size of Online Redo Log Files :
3) select sum(bytes)/1024/1024 "Meg" from sys.v_$log;
So counting all of them you will get the size of the Database.
How to find Up-Time of Database?
Execute the Below mentioned query to find out the uptime of the DB.
SELECT to_char(startup_time,'DD-MON-YYYY HH24:MI:SS') "DB Startup Time"FROM sys.v_$instance;
SELECT to_char(startup_time,'DD-MON-YYYY HH24:MI:SS') "DB Startup Time"FROM sys.v_$instance;
Subscribe to:
Posts (Atom)
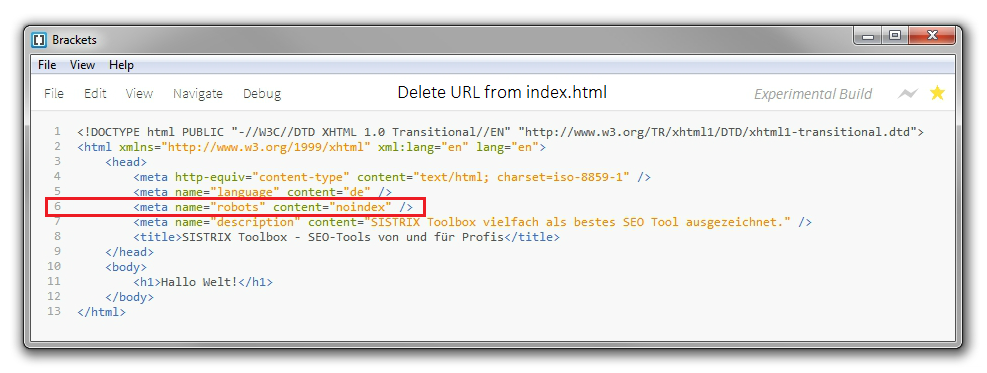
How can I remove a URL on my website from the Google Index?
To remove a specific URL (for example, the page http://www.example.com/page4.html) of your own website from Google’s index, there are two ...